Enable an AI Worker in Slack
How to create a Slack App, configure it, and connect it to an EverWorker AI Worker
This guide walks you through setting up a Slack App and connecting it to an AI Worker in EverWorker, so that users in your Slack workspace can interact with the AI Worker directly from Slack.
Note: Slack-enabled AI Workers are part of a new generation of AI Workers, currently available under the Labs menu in EverWorker.
Prerequisites
Before you begin, make sure you have:
- Access to a Slack workspace where you can create and install apps (you need to be a workspace admin, or have permission to install apps)
- An EverWorker account with access to the Labs features
- An AI Worker already created in EverWorker that you want to enable in Slack
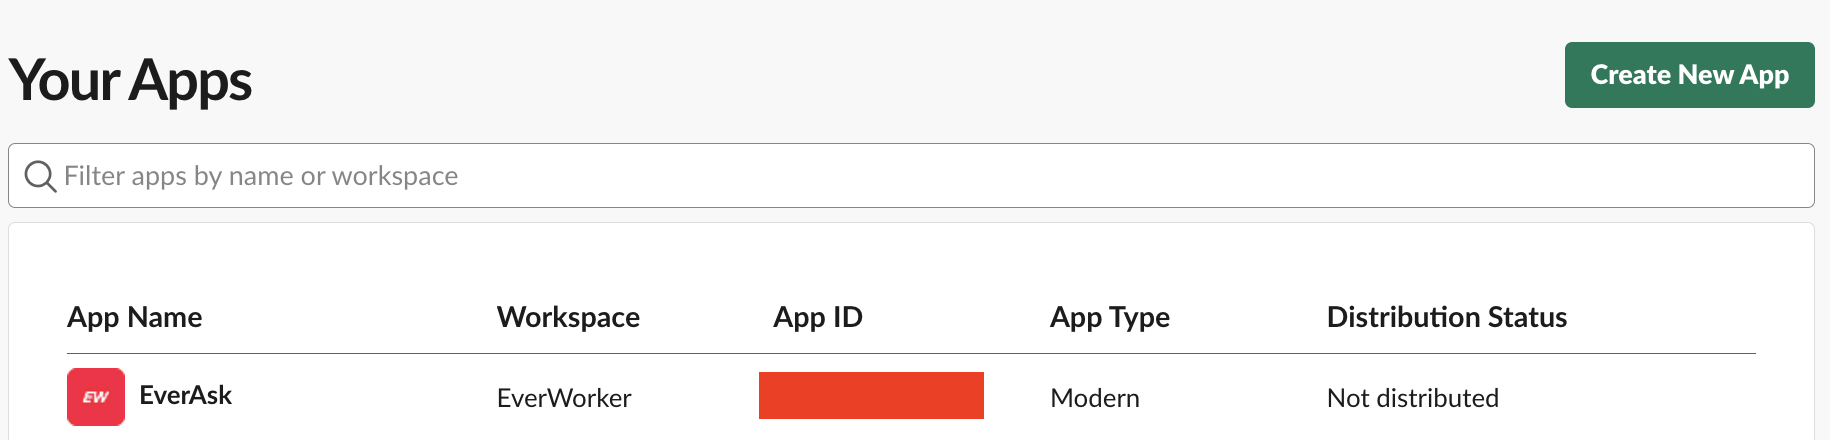
Part 1: Create and Configure the Slack App
Step 1 — Create a New App in Slack
- Go to the Slack API portal and click Create New App.
- Choose From an app manifest (recommended) or From scratch.
- Select the workspace where the app will be installed.
- Give your app a name (e.g., the name of your AI Worker).
Tip: If you choose From an app manifest, you can paste a pre-configured manifest to skip several manual configuration steps. See the Example App Manifest section at the end of this guide. You should replace the "https://cloud.everworker.ai/" with your URL.
Step 2 — Generate an App-Level Token
- On your app's Basic Information page, scroll down to the App-Level Tokens section.
- Click Generate Token and Scopes.
- Give the token a name (e.g.,
socket-token). - Add the following scopes:
connections:writeauthorizations:readapp_configurations:write
- Click Generate.
- Copy and save the token — you will need it later when configuring the EverWorker connector.

Important: Also note the Signing Secret on this same Basic Information page — you will need it for the EverWorker connector configuration.
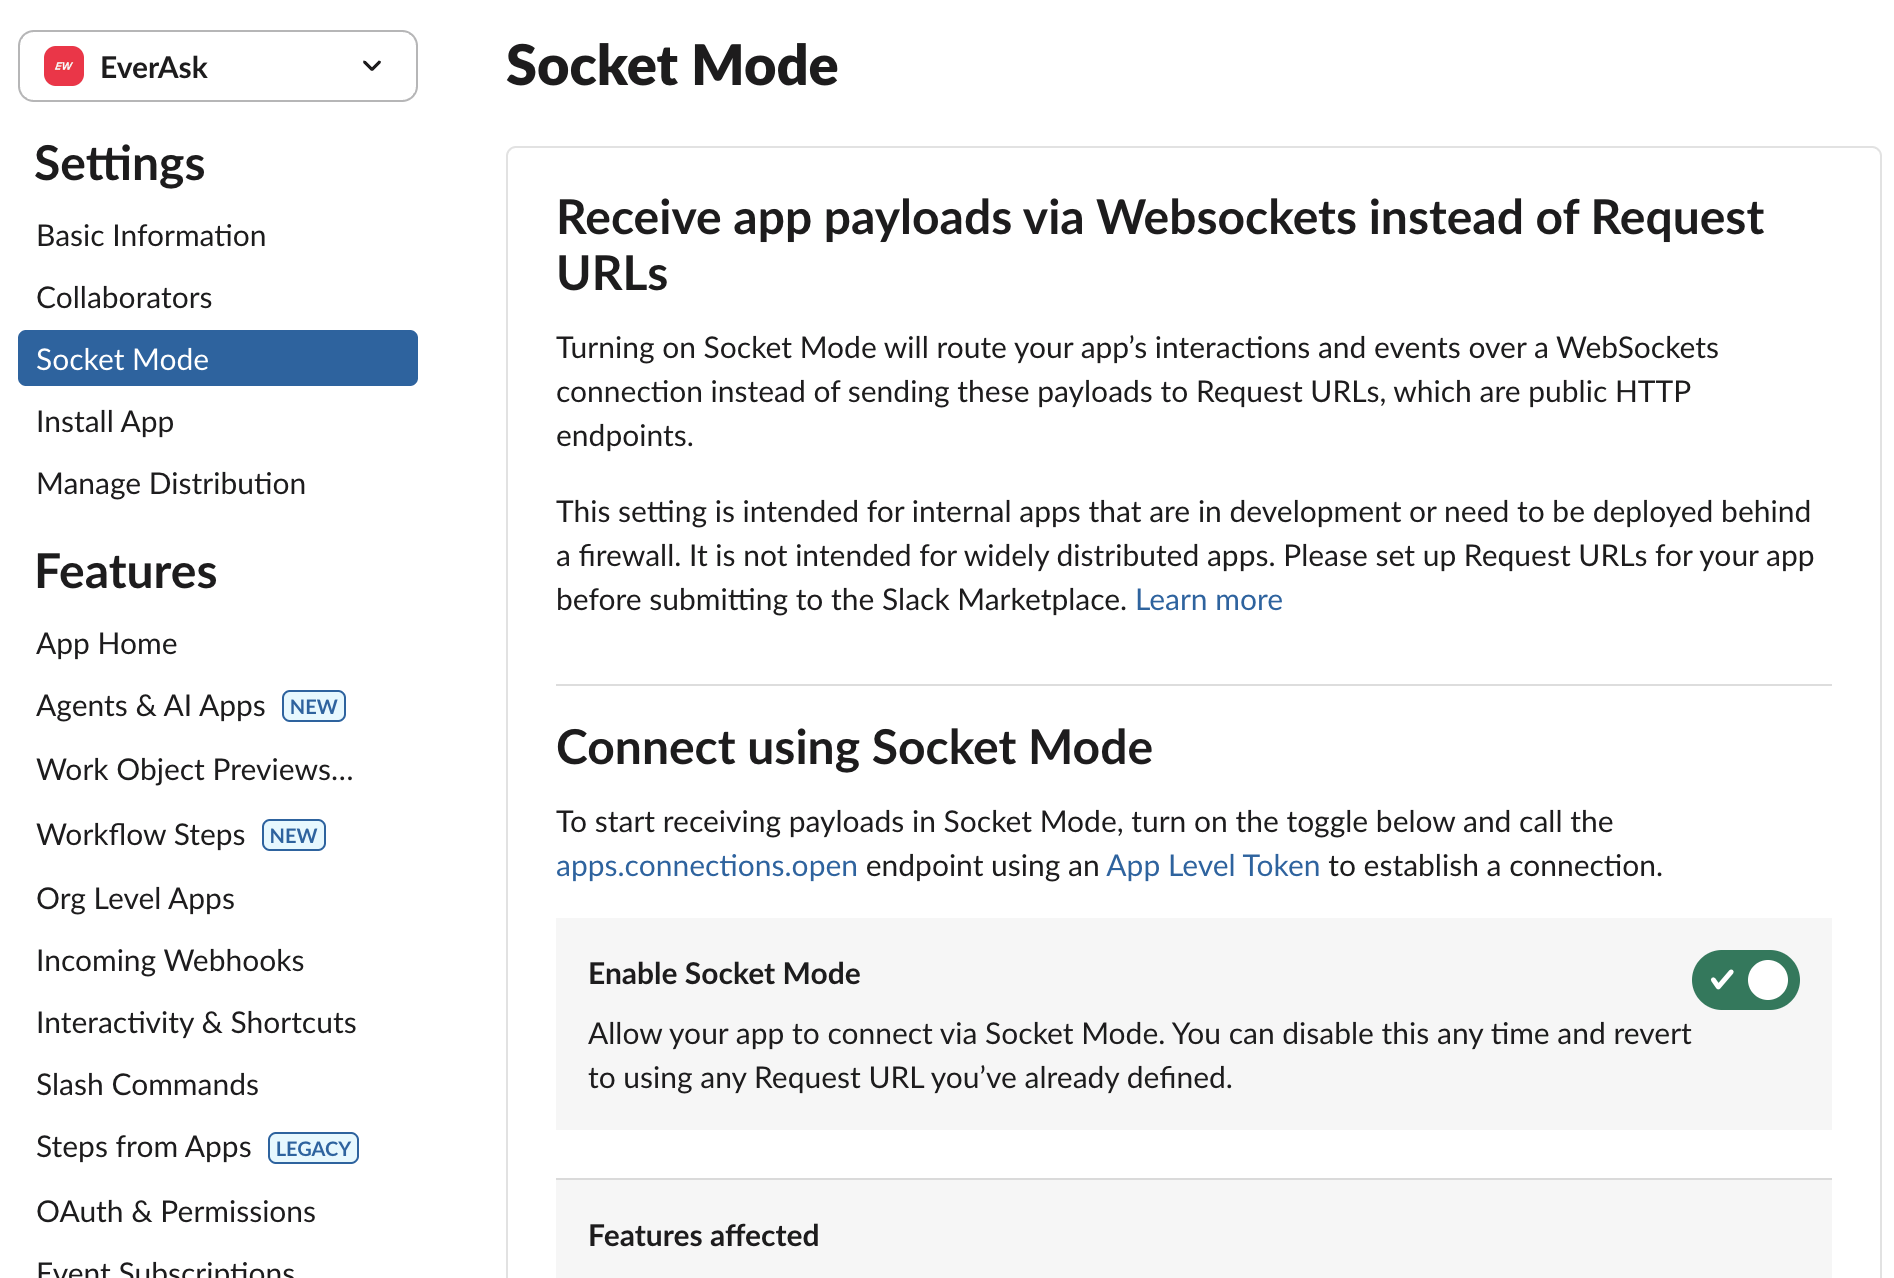
Step 3 — Enable Socket Mode
- In the left sidebar, go to Socket Mode.
- Toggle Enable Socket Mode to On.
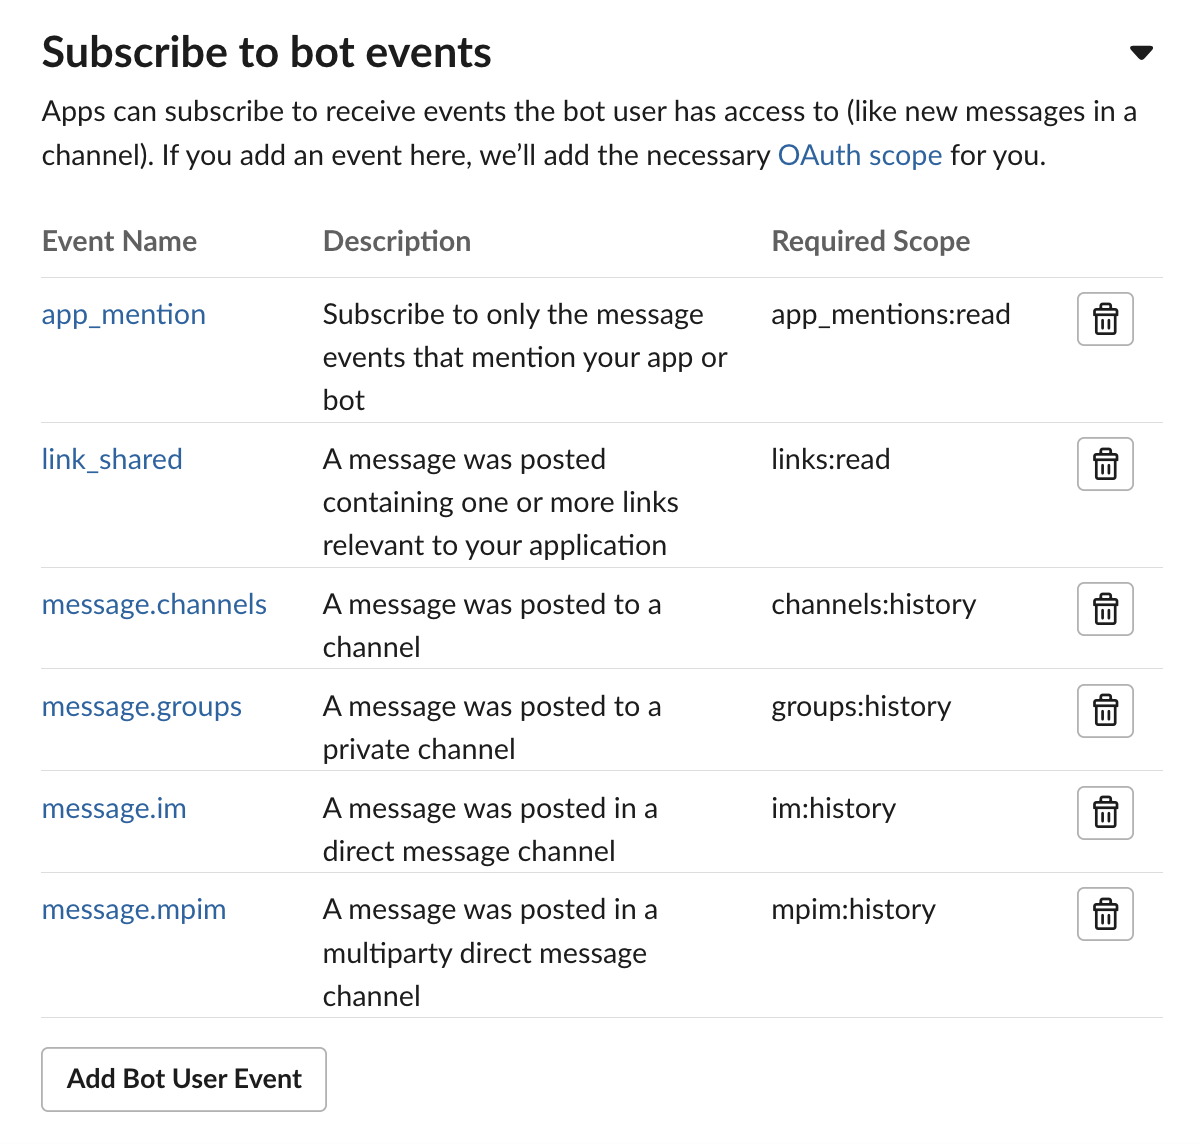
Step 4 — Configure Event Subscriptions
Important: Do NOT set a Request URL. It is not needed because EverWorker uses Socket Mode (WebSocket connections) instead of HTTP callbacks.
-
In the left sidebar, go to Event Subscriptions.
-
Toggle Enable Events to On.
-
Click Subscribe to bot events to expand the section.
-
Add at least the following bot events:
Step 5 — Configure Bot Token Scopes (OAuth & Permissions)
- In the left sidebar, go to OAuth & Permissions.
- Scroll down to the Scopes section.
- Under Bot Token Scopes (not User Token Scopes), add at least the following scopes:
| Scope | Description |
|---|---|
app_mentions:read | View messages that directly mention @AI Worker in conversations that the app is in |
assistant:write | Allow "AI Worker" to act as an App Agent |
channels:history | View messages and other content in public channels that "AI Worker" has been added to |
channels:join | Join public channels in a workspace |
channels:read | View basic information about public channels in a workspace |
chat:write | Send messages as @AI Worker |
chat:write.customize | Send messages as @AI Worker with a customized username and avatar |
chat:write.public | Send messages to channels @AI Worker isn't a member of |
commands | Add shortcuts and/or slash commands that people can use |
files:read | View files shared in channels and conversations that "AI Worker" has been added to |
files:write | Upload, edit, and delete files as "AI Worker" |
groups:history | View messages and other content in private channels that "AI Worker" has been added to |
groups:read | View basic information about private channels that "AI Worker" has been added to |
groups:write | Manage private channels that "AI Worker" has been added to and create new ones |
im:history | View messages and other content in direct messages that "AI Worker" has been added to |
im:read | View basic information about direct messages that "AI Worker" has been added to |
im:write | Start direct messages with people |
im:write.topic | Set the description in direct messages |
incoming-webhook | Post messages to specific channels in Slack |
links:read | View URLs in messages |
links:write | Show previews of URLs in messages |
mpim:history | View messages and other content in group direct messages that "AI Worker" has been added to |
mpim:read | View basic information about group direct messages that "AI Worker" has been added to |
mpim:write | Start group direct messages with people |
mpim:write.topic | Set the description in group direct messages |
users.profile:read | View profile details about people in a workspace |
users:read | View people in a workspace |
users:read.email | View email addresses of people in a workspace |
Note: Depending on your use case, you may need to add/delete scopes. The list above covers the most common scenarios for an AI Worker interacting in channels and direct messages.
Step 6 — Configure the App Home
- In the left sidebar, go to App Home.
- Enable the Messages Tab (also called Chat Tab).
- Check the box Allow users to send Slash commands and messages from the messages tab.

This step ensures that users can send direct messages to your app from its App Home in Slack.
Step 7 — Install the App to Your Workspace
- In the left sidebar, go to Install App.
- Click Install to Workspace (or Reinstall to Workspace if you have previously installed it).
- Review the permissions and click Allow.
- After installation, copy the Bot User OAuth Token (starts with
xoxb-) — you will need it for the EverWorker connector.
⚠️Important: Every time you make a significant change to your app's configuration (adding scopes, changing events, etc.), you need to reinstall the app to your workspace for the changes to take effect.
Part 2: Connect the Slack App to EverWorker
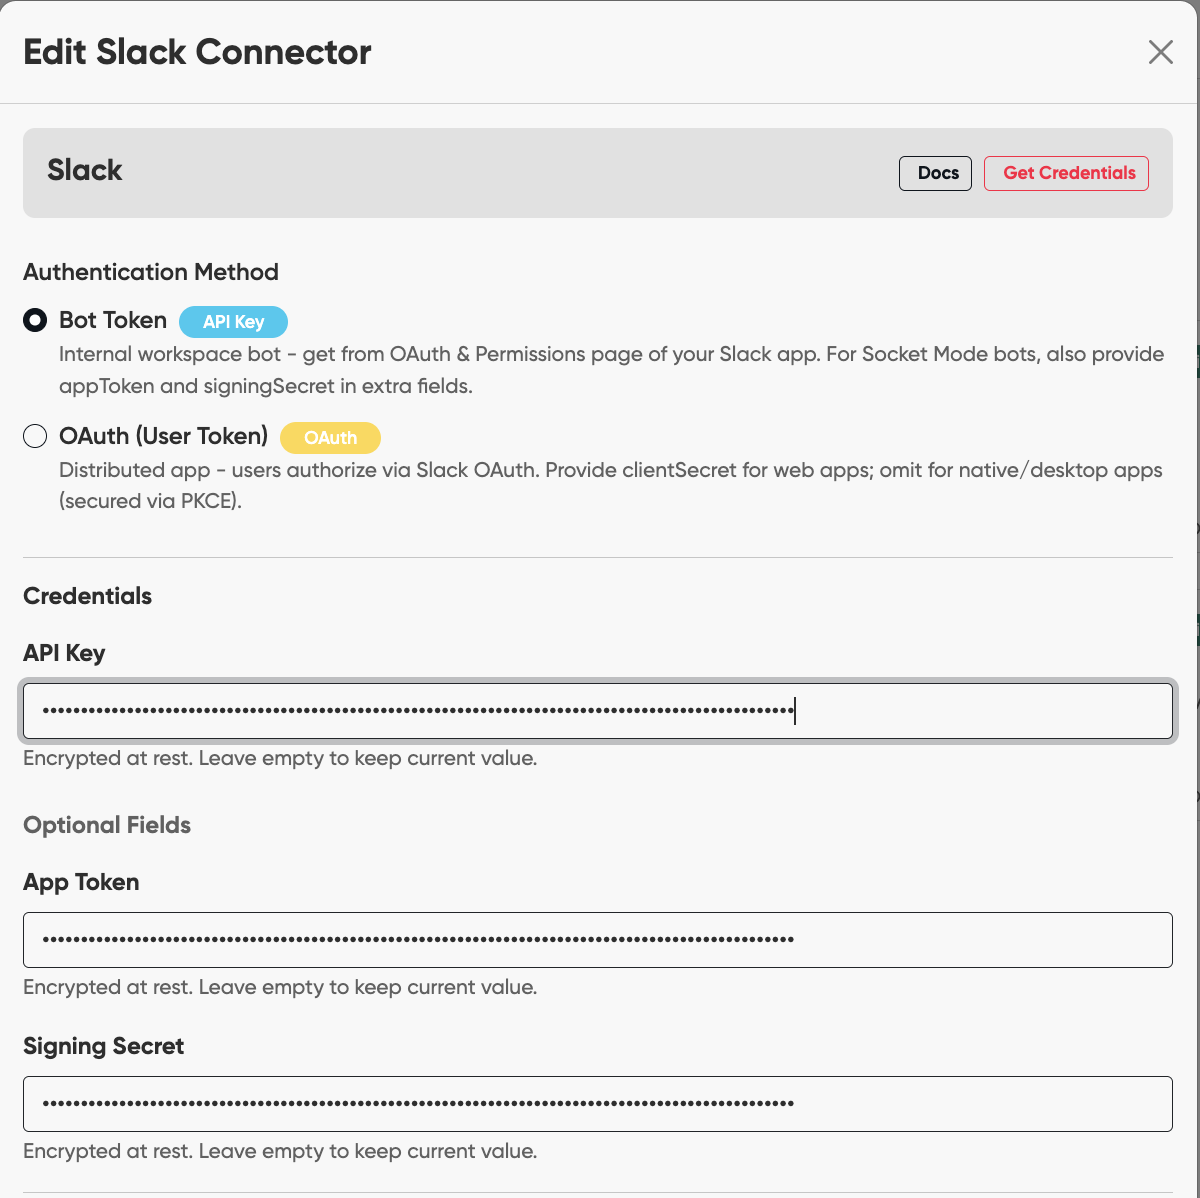
Step 8 — Create a Slack Connector in EverWorker
- In EverWorker, go to the Connectors section.
- Create a new Slack connector.
- Fill in the following fields using the values from your Slack App:
| EverWorker Connector Field | Value from Slack |
|---|---|
| API Key | Bot User OAuth Token (xoxb-...) — from Step 7 |
| App Token | App-Level Token (xapp-...) — from Step 2 |
| Signing Secret | Signing Secret — from the Basic Information page |
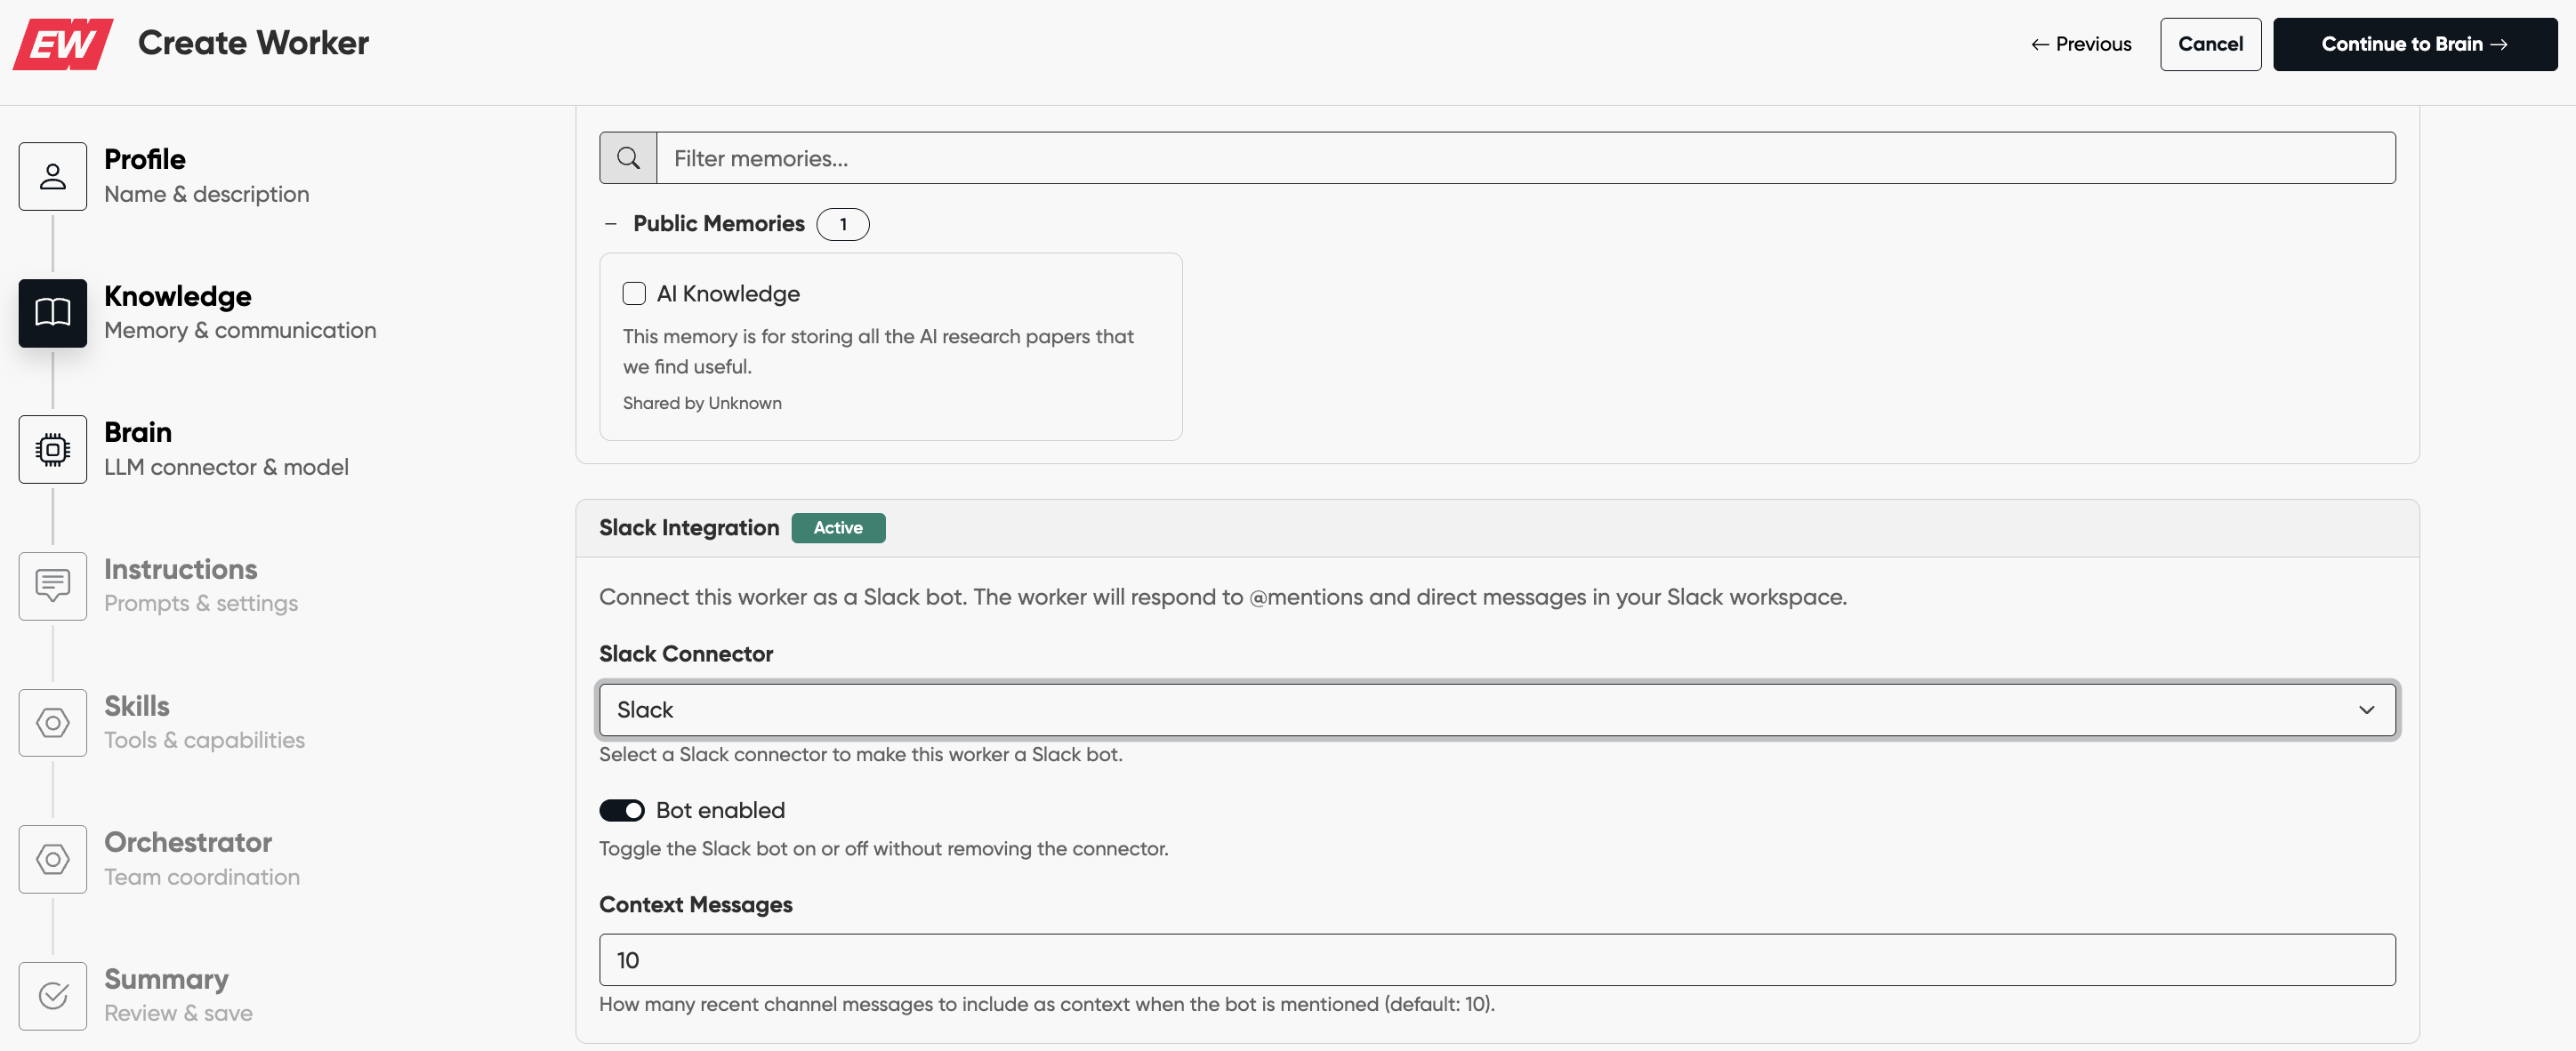
Step 9 — Enable Slack on Your AI Worker
- Open your AI Worker (new ones, under Labs) in the EverWorker builder.
- In the Knowledge section enable the Slack integration toggle inside of the AI Worker configuration and assign the Slack connector you just created to the AI Worker.
- In the Skills section toggle the Slack Api.

Your AI Worker is now connected to Slack. Users in your workspace can interact with it by:
- Direct messaging the app from its App Home
- @mentioning the app in any channel it has been added to
Troubleshooting
| Issue | Solution |
|---|---|
| Can't send messages to the bot in Slack | Make sure you completed Step 6 (App Home — enable Messages Tab and allow users to send messages). You may need to toggle the setting off and on, then reinstall the app. |
| Bot doesn't respond to messages | Verify that Event Subscriptions are enabled (Step 4) and that you subscribed to the correct bot events (app_mention, message.im). |
| Bot doesn't respond in channels | Make sure the bot has been added to the channel. In Slack, go to the channel, click the channel name, go to Integrations, and add your app. |
| Permission errors | Reinstall the app to your workspace after making any scope or configuration changes (Step 7). |
| Connector not working in EverWorker | Double-check that you used the Bot User OAuth Token (starts with xoxb-) for the API Key field, not a User Token. Also verify the App Token and Signing Secret are correct. |
Example App Manifest
Below is an example Slack App manifest that pre-configures the required settings. You can use it when creating your app via From an app manifest to skip manual configuration.
{
    "display_information": {
        "name": "EverWorker",
        "description": "I answer Everworker questions using the official documentation and codebase.",
        "background_color": "#1F2937",
        "long_description": "I can help you by:\r\n\r\n- Answering Everworker questions (how features work, how to use/configure them)\r\nTroubleshooting issues by checking the docs and source code\r\n- Drafting quick internal guides/snippets (steps, checklists, messages, templates)"
    },
    "features": {
        "app_home": {
            "home_tab_enabled": true,
            "messages_tab_enabled": false,
            "messages_tab_read_only_enabled": false
        },
        "bot_user": {
            "display_name": "EverWorker",
            "always_online": true
        },
        "slash_commands": [
            {
                "command": "/everworker",
                "url": "https://cloud.everworker.ai/slack/commands",
                "description": "Talk to EverworkerBot",
                "usage_hint": "help | status | run <task>",
                "should_escape": false
            }
        ]
    },
    "oauth_config": {
        "redirect_urls": [
            "https://cloud.everworker.ai/slack/callback"
        ],
        "scopes": {
            "bot": [
                "app_mentions:read",
                "assistant:write",
                "channels:history",
                "channels:join",
                "channels:read",
                "chat:write",
                "chat:write.public",
                "commands",
                "files:read",
                "files:write",
                "groups:history",
                "groups:read",
                "groups:write",
                "im:history",
                "im:read",
                "im:write",
                "im:write.topic",
                "incoming-webhook",
                "links:read",
                "links:write",
                "mpim:history",
                "mpim:read",
                "mpim:write",
                "mpim:write.topic",
                "users.profile:read",
                "users:read",
                "users:read.email"
            ]
        },
        "pkce_enabled": false
    },
    "settings": {
        "event_subscriptions": {
            "bot_events": [
                "app_mention",
                "link_shared",
                "message.channels",
                "message.groups",
                "message.im",
                "message.mpim"
            ]
        },
        "interactivity": {
            "is_enabled": true,
            "request_url": "https://cloud.everworker.ai/slack/interactive"
        },
        "org_deploy_enabled": false,
        "socket_mode_enabled": true,
        "token_rotation_enabled": false
    }
}
Note: After creating an app from a manifest, you still need to generate the App-Level Token (Step 2) and install the app to your workspace (Step 7) manually